Build Log 1: Architecture
USB audio that “just works”
One of the goals of OpenMic is to be able to plug it in to any computer and start using it right away, without any downloads or additional drivers. Luckily, there is a well-supported way to do this. The USB Audio Class (UAC) is the standard for sending and receiving audio via USB, and all the major operating systems support it. Specifically, we want UAC 2.0 or better, operating at high-speed. Technically we could use UAC1.0 at full-speed (which is counterintuitively 40x slower than high-speed), but the faster speeds allow for lower latency and better overall performance, so we’ll go with that for now.
I normally start a project assuming I can use a Raspberry Pi Pico for the microcontroller because they are cheap and easy to get started with. Unfortunately, USB is very complex and I don’t want to have to write my own UAC 2.0 implementation, even using a library like TinyUSB. But even if the Pico had better UAC support, it still wouldn’t be fast enough to handle high-speed USB. The Pico will still be useful in prototyping other aspects of the design, and you’ll see it appear a lot in future build logs, but we can’t use it for the final design.
So what does work? There aren’t a ton of microcontrollers that can handle high-speed USB, but the STM32N6 can. The only problem is, I’d still have to write UAC with TinyUSB. Also it is a relatively expensive microcontroller.
I’ll stop stringing you along, there is a solution here that checks all our boxes: the XMOS XU316. The microcontroller with an open-source UAC 2.0 implementation that I can adapt to the needs of the project, and enough extra power to handle everything else a microcontroller might need to do. Half the price of the STM32N6. I was so relieved to find this chip because USB terrifies me.
Analog-to-digital-to-analog
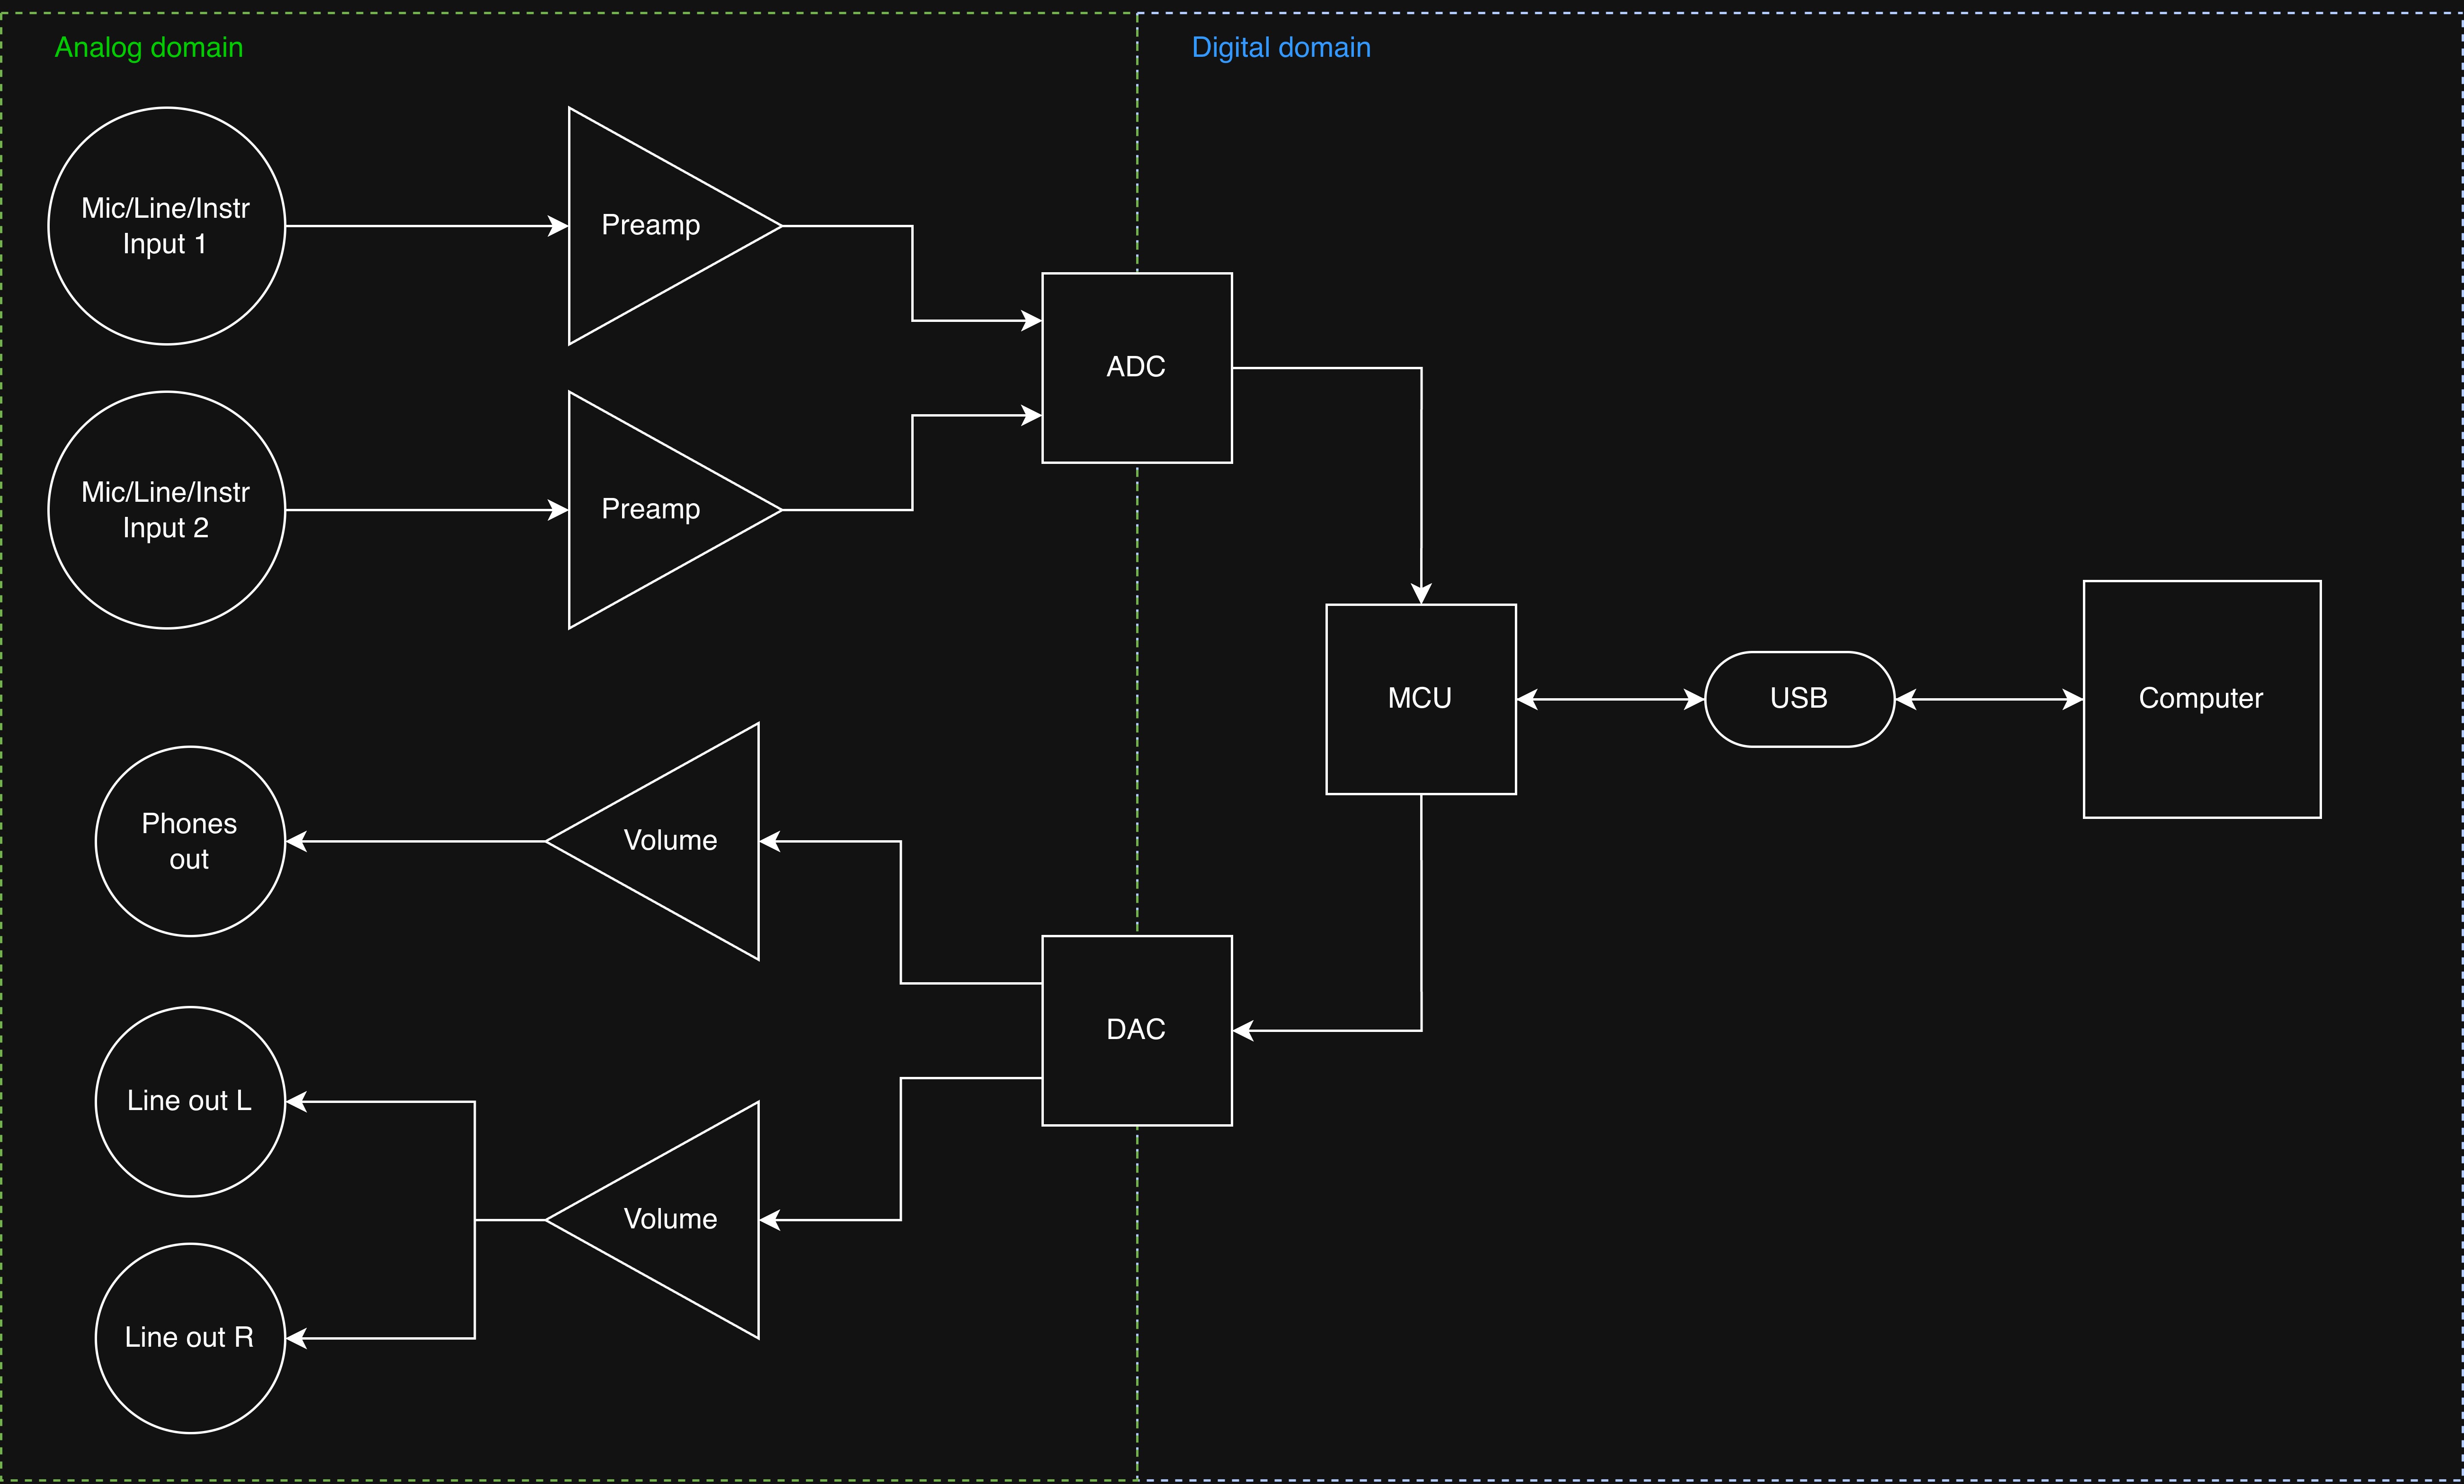
Ok, now how do we get audio into and out of the XMOS? Glad you asked, I was wondering the same thing. The answer is an analog-to-digital converter (ADC), and a digital-to-analog converter (DAC). These will, respectively, take an analog audio signal (from a microphone or an instrument), convert it into bits, and send those bits to the XMOS, or receive bits from the XMOS and convert them back into analog audio for your headphones.
If we were designing the absolute top tier, highest quality, squeeze-out-every-last-bit-of-performance-juice interface, I’d choose a dedicated ADC and DAC, increasing the cost, complexity, and size of the design. I’d look at Sabre, AKM, or Cirrus Logic for their best spec’d chips and choose those1.
I’m going to be smarter than that about OpenMic and use what’s called an audio codec (codec = encode + decode). Basically an ADC and a DAC combined into one chip. Codecs are typically slightly worse in noise and dynamic range specs than dedicated ADCs/DACs, but there are a few codecs that are “good enough”, meaning anyone who isn’t an absolute hi-fi snob with a studio quality Dolby Atmos sound setup and a knack for lying about what they can actually hear isn’t going to notice the difference.
This gives us a few options from the previously mentioned manufacturers, but the clear winner on paper is the Sabre ES9291. However, going with a codec introduces another option: the TAC5212 from Texas Instruments. The Sabre still wins on paper, but just barely and likely inaudibly. If we assume that the actual audio quality differences are inaudible between the two, there are several reasons I would choose the Texas Instruments codec over the Sabre:
- The data sheet. No one makes a data sheet like Texas Instruments, and a good data sheet makes a Huge difference in development speed and understanding.
- The TAC5212 has a smaller footprint than the Sabre codec, saving a bit of valuable board space.
- Better power consumption. This is critical for a USB-powered device, every bit of power consumption adds up.
- Expandable. The TAC5212 can be daisy-chained with other TAC5212’s and the TAA5212 (which is just an ADC) to expand the number of inputs and outputs easily.
The TAC5212 and the ES9291 share a lot of features, but at the end of the day the TAC5212 wins because of these reasons while still having “good enough” audio quality (I’ll be honest, the documentation is really what won me over in the end).
Analog audio
We know how we’re getting audio into the computer now, but we don’t know how we’re getting audio out of a microphone.
The TAC5212 can handle inputs up to around +8.4dBu2, but line inputs can be as hot as +24dBu. How do we deal with this? By adding headroom to the analog circuit we can accommodate higher level signals and attenuate them to meet the demands of the codec.
How much headroom then? +24dBu corresponds to a voltage peak of ±17.4V, meaning we would need ±18V analog rails, which is one of the standard audio supplies. But looking at other audio interfaces, the Scarlett 2i2 has a max input of +22dBu, and the Apollo Twin X has +20.2dBu. These values can both be achieved with ±15V rails, another standard value. The third option is ±12V, which is standard in Eurorack and could accommodate up to +20dBu.
The other consideration in headroom is distortion. The closer a signal is to the power rails, the more distortion it experiences, which is something we want to avoid. ±15V is a good compromise between headroom and power consumption. Because the device is running off of 5V USB power, generating higher voltages wastes more power.
Controls and UI
We need a way to control gain and volume on our inputs and outputs. The reason this is a decision we need to make at this stage in the design is because there are a few very distinct ways to go about this, and they influence everything down the road.
The first option is all analog. Analog switches and gain knobs that directly change the gain of the input circuits simplify the circuit itself and reduce costs, but the tradeoff is that the inaccuracy of the required analog components themselves can lead to major performance losses.
The second option is all digital. Send the audio directly to the codec without modifying it, and then digitally increase gain or attenuate. This method eliminates any analog components that can add noise to the circuit, but the problem is we want to accommodate microphones, lines, and instruments, which can vary over 1,000x to 10,000x in voltage level. And we already found out that we have to attenuate hot line inputs in the analog domain.
Luckily, there is a goldilocks solution. We can take the best parts of the analog controls, and combine them with the best parts of the digital controls. We have a powerful microcontroller, so we can make the user-facing inputs interface directly with the microcontroller, and then use the microcontroller to control precision analog components.
We’ll have to figure out exactly what that means, but we can start designing around the knowledge that we’ll need digital encoders and switches running on digital logic voltages (3.3V) that don’t directly interface with the analog domain.
If we’re controlling everything digitally, we might as well lean in to the modern design feel and use Neopixels (WS2812’s) for visual feedback. Neopixels are programmable LEDs that can display any RGB color and be chained together. We can use them for input/output signal level indication and gain knob position indication.
Power Supply
The XMOS XU316 requires 3.3V, 1.8V, and 0.9V. The TAC5212 requires 3.3V. We need +15V, -15V, and +48V (phantom power) for our analog circuits, and Neopixels require 5V. And we need to generate all of these voltages from a single 5V power supply while making sure we don’t blow anything up. Let’s start building!
Fun fact: the absolute best noise specs in audio ADCs/DACs are limited by the physics of the technology itself. Luckily, this physical limit is right around the limit of human perception, so improvements beyond this are unlikely to provide any practical gains in perceived audio quality. ↩︎
If you’re unfamiliar with decibels (dB), I’ll write a post that hopefully demystifies the very confusing topic, but for now just know that decibels are essentially a measure of loudness. More decibels means louder sound. ↩︎